Today we’re going to tell you the best time to plant pumpkin seeds and to help ensure your success, we’re going to take things further by giving you some protips for growing, as well as a ‘step by step’ description of what to expect as your pumpkins grow from seedlings to the robust, beautiful gourds that we all know and love.
Planting a pumpkin or even better, a small pumpkin patch, is a wonderful yearly tradition – especially if Halloween is your favorite time of year! It’s easy to do and even if Halloween is not your thing, there’s plenty that you can do with pumpkins, such as making pumpkin pie, roasting the seeds, making pumpkin latte, or even using the puree for your own or your dog’s occasional tummy aches!
Let’s take a look at the best time to plant pumpkin seeds and what you can do to make sure that those gourds are ‘making the grade’!
Table of Contents
Bottom Line Up Front
Late May is usually going to be the best time, unless you are planting for Halloween and live in a warmer climate, in which case you might plant your pumpkins in mid-July. You’ll want the ground temperature to be 65 to 70 degrees Fahrenheit and you can prepare the seedlings in advance if you like (more on this later) or simply plant the raw seeds about an inch under the ground and let Nature take its course.
What are the best months to begin planting pumpkin seeds?
Late May, usually around May 15th, is your ideal time for planting unless you are looking to plant Halloween pumpkins. For a Halloween crop, the middle of July is going to be the best. It should be warm enough to support the sprouting seedlings, with a soil temperature at a minimum of 65 degrees being ideal.
There’s more to pumpkin planting than timing
Timing is only one part of the equation, so in order to be thorough, we’re going to go through some factors that you are going to need to consider and to learn for future planting of your very own pumpkin patch. We’ll cover these in the following sections and then give you a ‘phase by phase’ analysis of what to expect when your new pumpkin plants first make an appearance up until they are ready to harvest.
Let’s look at some important factors to keep in mind for your current and future plantings!
Heirloom vs. Hybrid – An important distinction
When you pick out your seeds, you can just scrape them out of old pumpkins, but it’s better to get some seeds from a local distributor first to make sure that you are getting Heirloom seeds. With heirloom seeds, when you grow a particularly impressive pumpkin then you can take some seeds from it and slowly evolve your crops through future plantings.
Hybrids aren’t always guaranteed the second go-round, but with heirloom seeds you can have a yearly pumpkin patch with all of the nostalgia of your first and the advantages that you’ve slowly bred into your pumpkins.
It’s easy to do – just talk to a local farmer at your seasonal farmer’s market and ask them for heirloom pumpkins or seeds. It’s a nice way to start a tradition that you and your family will be enjoying for many years to come!
Full sunlight or shade – Where to plant your pumpkins
A little shade is okay, but you don’t want to overdo it. Pumpkins love a spot with full sunlight, but we understand that not all of the spaces you will be using are going to be guaranteed the best coverage. So, just keep in mind that light shade is okay – but not heavy. You want your pumpkins to get plenty of sunlight each and every day so that they will grow up strong.
What kind of soil is best for pumpkins?
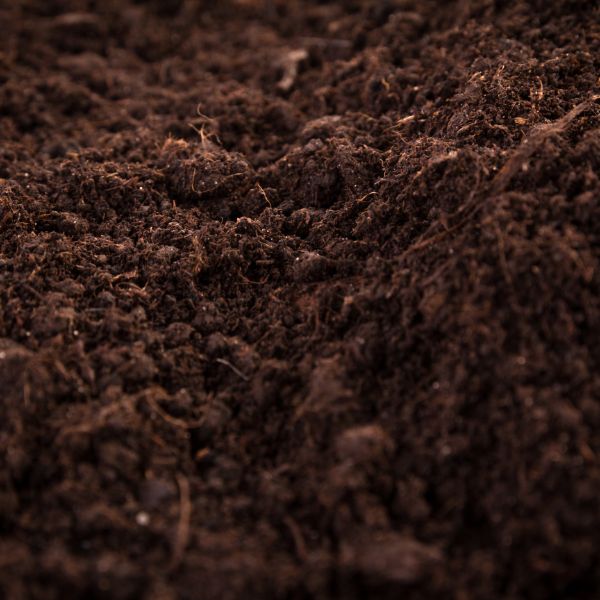

Just about any soil is ideal, but a little extra work will go a long way in ensuring a healthy pumpkin patch. Sandy soil is your best bet – it’s going to quickly warm up each day and the drainage will be good. If the soil in your area has a high clay content, then it’s a good idea to add some organic matter and a little sandy soil mixed in advance will not go amiss!
Finally, a pH of 6.0 to 6.8 is just about perfect for Pumpkins and other squash crops. If your soil is a little on the acidic side, then some careful application of lime in the fall can really help to prepare it for hosting your pumpkins at a later date.
How deep do you plant pumpkin seeds?

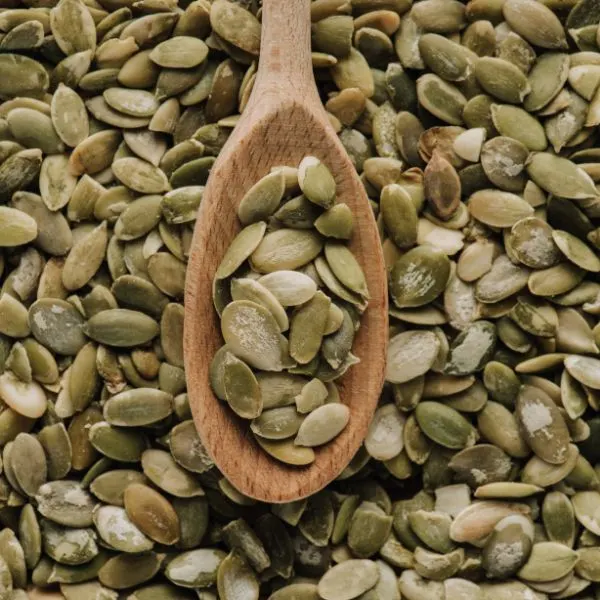
Planting is the easiest part, as you only need to poke a hole with your finger about 1 inch deep for your seeds. If you do multiple plantings, then space them 5 to 6 feet apart and you’ll be off to a perfect start.
Protip: Starting your seeds indoors
Get yourself a small cup, poking some holes in it for drainage, and plant 2 or 3 seeds inside in a bed of loose soil. Water this soil just enough to get it moist and you’ll want to place the cup on a heating pad. When the sprouts emerge, weed out the weakest ones and put the strongest and its cup in a south-facing window. If you got more than 1 strong sprout, you can put it in its own cup if you like. At this point, let them grow in the window or under a fluorescent bulb until the frosts outside have gone away and it’s warm enough for planting (65 to 70 degree soil temperature being ideal).
How much water do pumpkins really need?
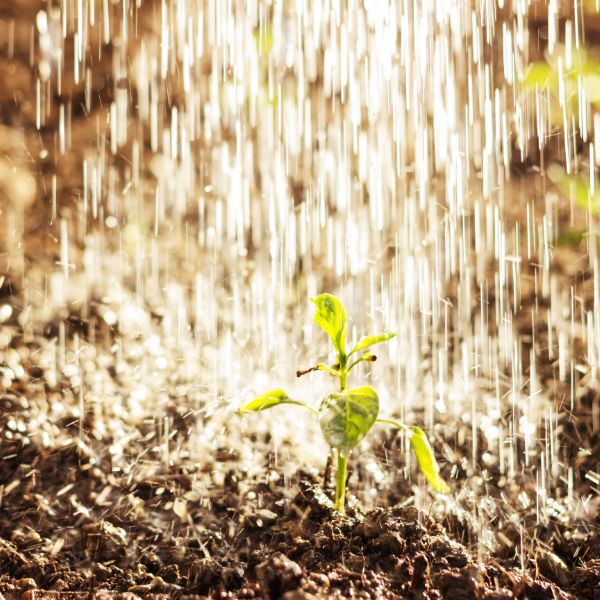
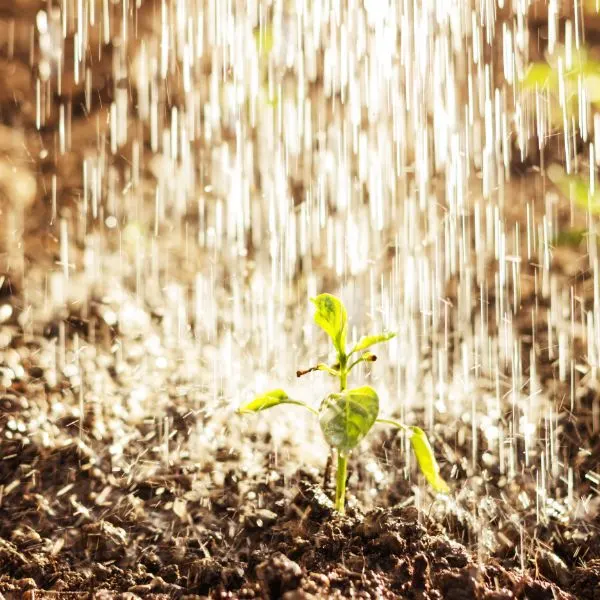
Pumpkins are about 80 to 90 percent water in their composition, so you’re going to need to water them quite a bit, depending on your specific environment. They need about 1 inch of water a week, but if you overdo it, then they can get root rot so it’s important to check each time before watering.
To do this, simply stick your index finger into the soil about an inch deep to the roots and if it’s already moist, then you don’t need to water your pumpkin. If it is dry, however, then water it deeply at the roots. Morning and evening waterings will likely be required, especially on hot days, and you want to avoid watering the leaves and the fruit unless it’s especially hot – in which case a little spritzing with a water bottle is best so that you don’t overdo it.
How long is the growing season for pumpkins?

At this point, you’ve probably been nodding along, perhaps with the occasional ‘okay, I can do that’, but let’s face it – how long is this going to take? Well, we’re happy to inform you that the growing season for your pumpkins is anywhere from 90 to 140 days.
Don’t worry – once they start to sprout, things move quickly, so you’re going to have a good amount of ‘visual confirmation’ to help keep your panic at bay. To further reinforce your confidence, we’re going to go next to the 7 stages of growth that you can expect.
This way, you will know exactly what to look for and during this growth period, you’ll be replacing ‘expectations’ with good, old-fashioned experience that you can keep and refine for many pumpkin patches to come!
What to expect – The 7 stages of Pumpkin growth
Knowing when to plant is only part of the equation – it’s much better to know exactly what to watch for. With that in mind, we’re going to include the 7 stages of Pumpkin growth, along with a protip or two, so that you won’t have to just ‘plant and pray’.
In time, these are 7 stages that you’ll be quite familiar with but if you are new to this, then here’s a peek at what you can expect!
1. Sowing the seeds
Late spring, typically mid-May, is going to be your planting season, unless you are targeting Halloween and your area is warm enough to support planting in mid-July. During this phase, the seeds are planted in a hole that is 1-inch deep and holes are spaced 5 – 6 feet apart if you are doing multiple plantings.
Protip: Overseed to ‘stack the deck’ in your favor
While you could just plant one seed, it is recommended that you maximize the chances of your seeds germinating by either preparing them in advance (as mentioned earlier in this guide) or by overplanting. Overplanting is accomplished by simply adding 2 – 5 seeds to each hole, covering them with dirt, and watering the area.
2. First germination
Provided that the soil is warm (65 to 70 degrees), then within the next 5 to 10 days you should watch for your seed to sprout. You’ll see two telltale oval leaves on each sprout and soon after, you will see a second set of rounder, more colorful leaves arriving to let you know that your seeds are healthy and on their way to the next phase.
3. Vines make their appearance
Within the next two weeks, you’re going to notice that new vines are popping up with a quickness! It will start with your plant reaching about 1 foot in height and when you begin to see the runners, a little nitrogen-spiked fertilizer is a good idea.
Protip: Keep an eye on those vines
Once your vines start appearing ‘in force’, switch to a fertilizer with phosphorus to help make sure that they grow up robust and healthy.
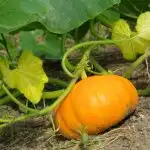
4. Flowers begin to blossom
At around the 8 to 10-week mark, you’re going to start seeing flowers. Male and female flowers will be easy to tell apart, as the males will appear first and the females are going to have tiny fruits behind each flower that will later become your first batch of pumpkins. Congratulations – we’re almost there!
Protip: a little compost goes a long way
Well-composted manure at this time will help those budding pumpkins to develop during this stage, or you can simply add your favorite organic fertilizer formula to help them along.
5. Pollination occurs
Once both the male and female flowers are in, then Nature will take advantage of the pollinating insects in the area, and the female flowers will close up once they have been properly pollinated. During this time, you’ll see a lot of male flowers dropping to the ground but don’t panic – you haven’t done anything wrong, this is to be expected once the male flowers have done their job.
Protip: Paint a little picture of pollination
Plants that attract pollinators, such as sunflowers or lavender, are good to have in your garden during this phase, and make sure that you aren’t employing pesticides during this time. If you aren’t seeing any bees, butterflies, or other pollinating insects, you can help things along by paintbrush pollination, but try to go the natural route if you can as this takes a lot of time.
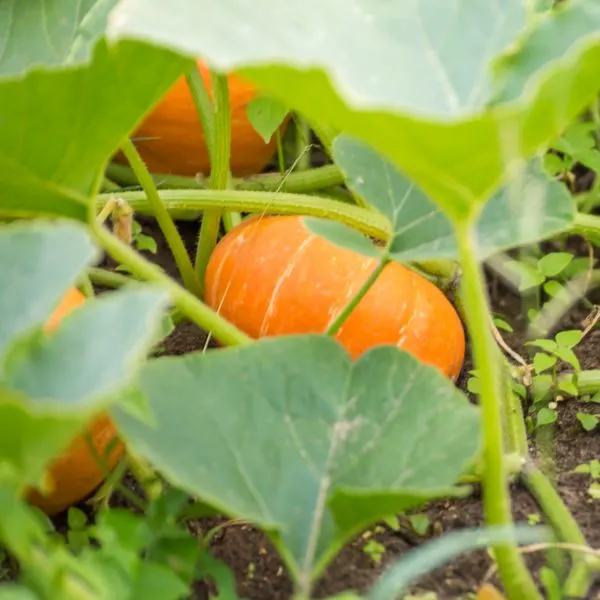
6. Pumpkin time – from flowers to fruit
As the female flowers close their petals tight, your pumpkins will begin forming in earnest, and this process is going to take around 45 to 55 days to complete. During this time, your pumpkins will get bigger and the skin will firm up and color in nicely, and around 2 – 3 months in the pumpkin vines will go brown and wither.
Protip: Keep those vines in control
Speaking of vines, when a few pumpkin fruits have started forming, you can trim off the vines by simply pinching the fuzzy ends off of them. For the main pumpkin vine, 10 to 15 feet in length is best, while secondary runner vines may be pruned at 8 to 10 feet in length to help control them. Any additional vines sprouting from the secondaries may be trimmed right away with no ill effects.
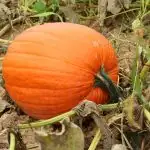
7. Harvest
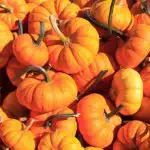
Your pumpkins will be ready to harvest once the stems have toughened up and your pumpkins are looking their expected color (there are blue, black, and other varieties if you don’t like the standard orange). You can further test them by giving them a good thump and if it sounds hollow and the skin is firm, then they should be ready for harvest.
How do I harvest my pumpkin?


Okay, so you’ve put in the hard work and your pumpkins are looking hearty, so what is the proper way to harvest these beauties? Well, provided that the stem is hardened and robust, the skin feels thick, and a solid thump with your finger provides a nice ‘hollow’ sound, then you should be ready to go. Pumpkin harvesting is usually done in mid-fall, right before the temperatures are expected to drop to the 40’s at night – you definitely don’t want to wait for that! Here is what you’ll need to do:
1. Get yourself a sharp knife ready and take it out to your pumpkin patch or single plant.
2. Measuring from the base of the stem to approximately 2 inches out, sever the stem neatly.
3. Gently lift your pumpkin and we’ll want to store it out of the weather so that we can cure it for maximum shelf-life.
4. Gently clean off any accumulated dirt and store your pumpkin somewhere that is 80 to 85 degrees, with a relative humidity of approximately 75 to 80 degrees. Keep your pumpkins here for 7 to 10 days, after which you can store them in a cool, dry place.
Ideally, you want them out of the sunlight and 50 – 60 degrees is the best temperature. You also want lots of air circulation, so put them somewhere well-ventilated. Your stored pumpkins should now last up to 3 months!
FAQ
Today we’ve talked about the best time to plant pumpkin seeds, as well as what to expect, and we’ve given you a few tips that will help you to empower them to grow up happy and strong. Before we go, however, we’re going to address some frequently asked questions in order to shore up any spots that we might have missed along the way. Let’s take a look!
How do I keep pests from pummeling my pumpkin?

Pumpkins are attractive to a number of pests, who will consider them yummy and ‘up for grabs’ if you are unlucky. If you are looking to avoid commercial insecticides, then we have a couple of tips for you. First, a simple ring of Epsom salt can be placed around a growing pumpkin to effectively keep snails and slug away.
Next, a non-chemical option for keeping Squash bugs away that you can use is called ‘Neem oil’. It’s made from evergreen plants and should help to keep those pests away, but it’s good to be proactive. If you haven’t planned for this possibility, check your plants for yellowing pumpkin leaves – this is usually the first sign that insects have taken an interest in them – and break out the neem to help keep them away or get professional assistance if you’re growing a lot of pumpkins and see a line of yellowing in your patch!
What is the best time to water pumpkins?

Morning is best and during hot days, you should water in the morning and the evening. You can spritz the leaves and pumpkins very lightly with a water bottle if you live somewhere that gets really hot, for a little additional protection. Your pumpkins need about 1 inch of water a week and depending on your environment, that could mean watering 1 – 3 times per week.
Check the soil with your finger, putting it about an inch in so that you can feel roots, and if it’s dry then your pumpkin is thirsty.
Do you need to prepare seeds from a fresh pumpkin before planting?

You don’t have to, but it’s a nice way to help ensure a healthy pumpkin from the get-go. Being proactive can save you a lot of disappointment, especially if you are growing pumpkins with the kids, and it also teaches a neat little gardening skill that can be used with other plants in the future!
So, you don’t have to grow out the seedling beforehand, but it’s a good idea, if only to show the kids how it’s done so that they can keep that little gardening nugget o’ knowledge for the future!
Can I save seeds from big pumpkins for next year?


Provided that you have gone with our recommendation of using heirloom seeds, then YES, you can keep a few and replant the big ‘uns and you’ll really like the results. The Farmer’s Almanac has an excellent article on the subject that will tell you how to pick out and preserve the best heirloom seeds so that you can start saving them and really make that Pumpkin patch your own!
Before we go, If you would like to see the harvesting steps just to make sure that you’re ready, then simply click this link to be redirected to YouTube so that you can see them being performed firsthand! That said, let’s wrap this up so that you can get started on that Pumpkin patch!
Wrapping up what we’ve learned today
In this article, we’ve answered the question ‘what is the best time to plant pumpkin seeds?’ and the quick answer is ‘between mid-May to mid-July’. For Halloween pumpkins you’ll want to go the July route and within 90 to 140 days you should have fully-grown pumpkins that you can be proud of.
Just remember that you can prepare those seedlings in advance and once the vines are popping up, a little phosphorus fertilizer can really help supercharge their growth cycle. Plant some pollinators, like sunflowers or lavender in advance, as well, and this will help to ensure that the next phase runs like clockwork.
Finally, don’t forget to watch those vines – trimming the mains at 10 to 15 feet and the secondaries at 8 to 10 – as otherwise they can overrun your garden if you’re not careful. With a little luck and a lot of love, you’ll have a beautiful patch of pumpkins mid-Fall and a new yearly tradition that you and your loved ones will surely treasure.
Oh, and save those Heirloom seeds – as the years go by, you’ll notice similarities as they grow, and your Pumpkin patch will become uniquely and truly your own!
More Gardening Stuff