If you’ve been wondering how to grow hydroponic tomatoes, then you probably know by now that the hardest part is wading through the sheer frightening volume of information out there. If so, then take a moment and relax – we’ve got you covered!
As you proceed through this guide, we’ll give you a ‘crash course’ that should give you just enough information to ‘hit the ground running’ and raise yourself a successful crop of hydroponic tomatoes.
There are plenty of other resources you can work up to later, but for now let’s keep things simple and practical. We’ll tell you what you need to grow hydroponic tomatoes NOW and you should be able to get everything prepped and started this week if you like – it’s all up to you!
Table of Contents
Hydroponic growing -Your ‘Crash Course’ guide to the Basics
In order to prepare you for getting started with growing hydroponic tomatoes, we’ll need to give you a ‘crash course’ of sorts. We don’t want to discourage you, so rather than flood you with too much information, we’re going to cover the bare-basics so that you’ll have enough information to get started and a foundation on hydroponics that you can build on as you go.
Simply put – we’ll give you enough to get started with confidence so that when we’re done, you can grow hydroponic tomatoes with confidence. If you want to get more complicated later, then the lessons we’ll share here can be built on for more advanced setups later.
For now our goal is to simply give you what you need to grow tomatoes now, no more and no less! We’ll start things off with the pros and cons of hydroponics, a quick look at available kits, and then a step-by-step section that will get you from seedlings to harvest with the setup that you choose!
The pros and cons of hydroponic gardening
Setting up the right expectations is important so that you’ll know what to expect and also so that you have a realistic understanding of both the ‘good’ and the ‘bad’ bits of this approach. We’ll give you a ‘quick and dirty’ look at the pros and cons so that you’ll know exactly what you’re getting into with hydroponic tomatoes.
The pros
Speed – Hydroponic tomatoes grow up FAST – roughly 30-50% faster than soil-bound tomatoes.
Maximized yield – In the tropics, tomatoes grow as perennials, so with indoor hydroponics you could get many years of yields. Even with outdoor tomatoes, however, the faster growth rate ensures maximized yields, sometimes as much as 10 times what you would get with standard earth-bound tomatoes!
Controlled environment – Without dirt, you don’t have to worry about pests that might occur there, such as nematodes, and with indoor hydroponics a lot of insects are avoided as well. Overall, it’s also a cleaner set up and this is quite appealing to an organized mind.
Low water ‘footprint’ – Hydroponic watering schemes may be up to 90% more efficient with water use than a standard gardening setup. Water is directly flushed in from reservoirs or dripped in from hoses, depending on your setup, but the amounts are always granularly controlled.
Adaptable – You can grow hydroponic tomatoes indoors in the arctic circle if you like – setups can fit any space and any environment to give you fresh tomatoes wherever you live.
The cons
Startup costs – Getting started with a kit is costlier than preparing a garden in the backyard, although you can cut a lot of corners if you are the DIY type or have a helpful family member who is so inclined.
Learning curve – You’ll have to get in the habit of checking for new things. EC level, pH levels, making sure hoses aren’t clogged and watching for algae in your reservoir.
Electricity bill – If growing indoors, you’ll need to calculate what your lights and water pumps are going to need daily to anticipate electric costs. Solar panels can help quite a bit with this, but those add to your initial costs.
Pruning – Pruning is a little different with hydroponics. You need to trim suckers and keep your plants at ideal dimensions for your allotted space. Don’t worry – we’ll cover what you need in this guide, but it deserves mention.
Types of hydroponic kits on the market
There are 6 types of hydroponics systems that you will run into the most, so we’ve collected a little information on each to give you an idea of how they work. We’ll keep it short and sweet so that we can get on to the steps that you’ll need to get started!
Aeroponics

Probably the most expensive systems, aeroponics are also one of the most efficient methods out there. These hydroponic systems suspend the plants in the air, feeding the plants nutrients by the means of misters and an oxygenated air pump.
Deep Water Culture
")
With a deep water culture, you have a reservoir of water and the plants are suspended over it so that their roots are submerged in the nutrient solution. They’re held in place by a net filled with substrate and pretty much look like upgraded buckets. You can see an example on Amazon here with this Vivosun system.
Ebb and Flow

Also known as ‘flood and drain’ systems, Ebb and Flow hydroponics works by releasing nutrient solutions on a timed cycle. It’s not as commonly used as many of the other methods, but some hydroponic gardeners prefer this option as it gives ‘timed exposure’ rather than ‘constant exposure’ of the plant’s roots to the nutrient solution.
Hydroponic Drip
With a hydroponic drip, imagine plants suspended in nets so that their roots are in a thin layer of nutrient solution. A hose system is also in place with holes in it, so that water is circulated through the hose and drips slowly out onto the plants at a continual, measured rate.
Excess water is regularly returned to the reservoir and the pump system helps to ensure that the nutrient solution is heavily oxygenated.
Nutrient Film Technique or NFT
With a nutrient film system, you have a reservoir with an air pump and an airstone to oxygenate the solution, and plants are suspended in nets in their own channel. On timed intervals, the nutrient film is pushed so that it enters the channels to nourish the plants.
Wicking system


Wicking systems are the earliest form of hydroponics and they’ve been around for thousands of years and are still used to this day. The premise is simple – have you ever seen the science trick where you pour a little water down a string and the water clings to it?
Wicking is the same principle – a bit of rope, wick, or felt is used to deliver nutrients to plants that are hanging suspended in nets. The wick is attached to both the nutrient system and the spot where it needs to go for the plants, so the nutrient water just travels down at a slow, reliable pace in accordance with gravity and physics. It’s simple and effective, which is why we still use variants of this technique today!
A Closer Look at the Kratky Method: A Simple Hydroponic Solution


For those intrigued by the simplicity and efficiency of hydroponic gardening, the Kratky method presents a fascinating avenue to explore. Named after its developer, this method is celebrated for its straightforward approach to growing hydroponic tomatoes, eliminating the need for water pumps, electricity, and the constant monitoring of water levels.
The Kratky method functions by allowing plant roots to hang directly into a nutrient-rich solution, with a portion of the roots exposed to air, ensuring adequate oxygenation. As the water level gradually decreases, the roots consume the nutrients while growing longer to access the solution, promoting healthy plant growth and potentially high yields of delicious tomatoes.
This system is especially well-suited for an indoor garden setup, where space might be limited and simplicity is key. It’s a great way to grow cherry tomatoes, among other tomato varieties, with minimal fuss and equipment. The method’s reliance on passive hydroponics makes it an ideal choice for beginners or those looking for a low-maintenance option.
Incorporating the Kratky method into your hydroponic setup requires just a few basic components: a container for your nutrient solution, net pots for your tomato seeds or seedlings, and a suitable growing medium. Lightweight options like clay pebbles or rock wool are popular choices, offering excellent support for plant roots while allowing easy access to the nutrient solution below.
This method shines in its ability to produce juicy tomatoes with minimal input, making it a testament to the effectiveness of hydroponic systems in maximizing fruit production within a controlled growing environment. Whether you’re working with a small grow tent or a spacious grow room, the Kratky method can adapt to fit your needs, providing a rewarding hydroponic gardening experience without the complexity of more involved systems.
Hydroponic growing – Here’s what you’ll need to do!
As kits can vary quite a bit, we’re going to take a general approach here that will include steps which apply to a majority of hydroponic setups. If your kit is a little different, don’t worry – think of this as a ‘primer’ on the basics and read through it anyway. No matter your kit, there is information here that you can apply, so please give it a read-through and use every bit that applies to your specific kit.
You’ll find that most, if not all of this, applies to your set up and there are also some tips that you might not have considered that can put you ‘ahead of the game’ with any kit you’ve selected. With that said, let’s get this show started – here’s what you’ll need to do and know to get your first hydroponics setup up and running!
Materials Needed:
- Hydroponics kit of your choice
- Growth medium such as clay pellets or perlite (some exceptions, see steps)
- Water-soluble fertilizer (NPK 4-18-36)
- EC and pH meter
- Trellises
- Tomato seedlings
- LED Grow lights (for indoors)
- Mesh planting pots (if applicable with your kit)
Phase I – Preparing your Hydroponics environment
In this section, we’ll give you the basic steps for preparing your hydroponics kit and putting everything into place so that it’s ready for Phase II – your growing stage. Use this as a ‘loose guide’, as each kit is a little different, but read through each step and it should keep you focused and give you a foundational understanding of how all of the parts of your kit work together and what to expect.
Let’s get started!
1. Selecting or building your kit
You’ll need to settle on your setup, keeping in mind the space that you have to work with, how much water it will need to use, and the expected electrical costs per day for pumps, lights, and other hydroponic gear that needs it. Don’t forget about solar options – every bit of savings helps and those panels pay for themselves in the long run).
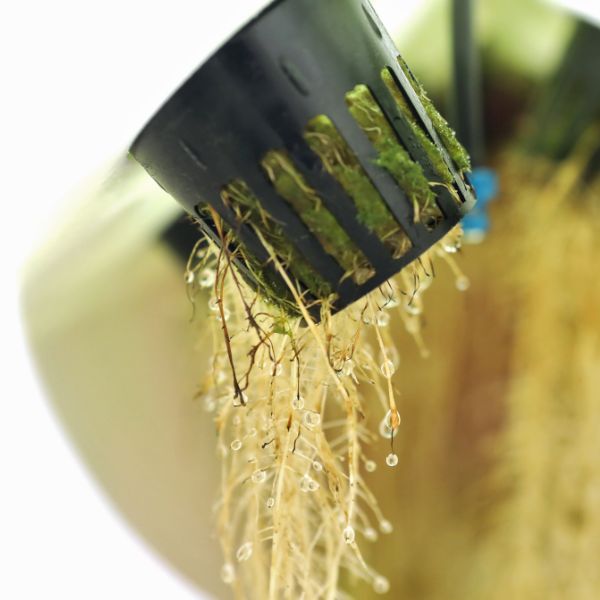
2. Substrate considerations
With the exception of aeroponics, you’re going to need a growing medium in order to support your tomatoes. We’ll trellis them later, and this will help, but we need a medium for now that’s going to be conducive to holding air, water, and your nutrient solution, along with providing a supportive niche for your tomatoes.
Clay pellets are the cheapest way to go, although if you are using a deep-water system then you can skip this step as the bucket lid will hold your tomatoes up. Vermiculite and perlite are also solid supportive options that can help retain nutrients.
3. Devise your nutrient bath
We need a water-soluble fertilizer for these to work – after all, hydroponics is about bathing those roots in nutrient water so that they’ll get everything they need. The NPK is the vital part here, and we suggest a 4-18-38 like this Masterblend for tomatoes. It’s completely water soluble and the NPK is just about perfect for your hungry, growing tomatoes.
4. Indoor growing considerations
If you are growing indoors, then you’re going to need growing lights, with adjustable LED full-spectrum lights being the best way to go. They’ll consume the least amount of power and you can adjust them according to your tomatoes’ needs.
When they are young, tomatoes need more blue light, though after they blossom you’ll need to switch your lights to red. If you’re growing outside, then you can skip this step, but otherwise you’ll need to invest in those lights and get them set up.
5. Trellising concerns
You won’t need these until you’ve placed your seedlings, but you need to consider how to trellis your tomatoes. Tomatoes are dense fruits, so they’re pretty heavy, and you’ll need to be able to support them.
Many kits will have trellising built-in or as an easily upgradable option, but if your kit doesn’t you can always make do with a makeshift tripod or even coil and structure wire coat hangers to repurpose them into a supportive trellis. You can view an excellent resource on trellising here if you like that will help you get those creative juices flowing for making your own design.
6. Seedlings
We’re going to need seedlings to transplant into your hydroponics array. You can either purchase them at your local nursery or you can germinate some seeds on your own at home. If you decide to buy them, make sure you go with strong seedlings – think ‘5-5’ as an easy way to remember what you’re looking for.
The seedling should be at least 5 inches tall and you want at least 5 visible leaves and consider how big this variety will get. If it’s a tall variety, you’ll be doing a lot of pruning. Finally, ensure it keeps within its allotted space, so a little planning now will save you a lot of headaches later.
7. Filling the reservoirs
At this point, we’ve got our basics, so it’s time to fill your reservoirs with the recommended powder-to-water ratio for your water-soluble fertilizer. If you’re grabbing cold water from storage or the tap, let it heat up to room temperature before you give it to your tomatoes – we don’t want their first hydroponic meal to be a cold one, as that’s not good for their health.
8. Monitoring considerations
We’ll need to make sure that your tomatoes have the ideal EC and pH levels before we get started and you’ll want a way to monitor these values later. The EC is short for electrical conductivity, and tomatoes need a value falling between 2.0 to 5.0. The pH tells us how alkaline the solution is, and tomatoes are happy with a small window of 6.0 to 6.5. If your kit does not include one of these, you can get an inexpensive meter such as this YINMIK digital EC and pH meter for aquariums (certified for Hydroponics too) or for larger setups you can invest in this YINMIK pH EC Monitor continuous-read model. We recommend starting with the cheapest first – get a feel for your setup, as you’ll want to customize it and it’s better to hold-off on the pricier accessories until you’ve gotten a feel for your favorite hydroponics style and setup.
9. Almost showtime – Let’s assemble your kit!
Go ahead and assemble your kit per the instructions or if it’s a DIY, then build it to your specifications and connect everything up. With kits, this usually involves connecting your pumps, setting up your hoses (loose zip-tie loops make for fast and effective organization – just use loose loops with lots of slack so you don’t pinch any hoses and you can mount them out of the way).
Don’t forget things like putting an airstone into the water reservoir, connecting your irrigation hose – just stick to the instructions with you kit and you can always test things like the timer before you go ‘live’ – it takes a little extra time, but it’s much less frustrating than transplanting your seedlings only to find that one aspect of your setup needs to be tweaked.
Our best advice is to use things like the zip tie loops to ORGANIZE your hydroponics setup as best you can in the space you have – this makes addressing any problems a piece of cake, since you’ll have easy access to every part of your setup.
Finally, if you’re using a growing medium you can wash it well before using it with water and alcohol and when it dries, you can put it in your mesh pots (if applicable) and put them into place. At this point, we should be ready to plant your seedlings.
Phase II – From planting to harvest
Now that the hard part is done, it’s time for us to move the seedlings to their new home and to watch them grow up and start bearing fruits. Below are the final steps to make this happen!
10. Planting your seedlings
This is basically the same as transplanting tomato seedlings to dirt – you want to make a small hollow in the center of your substrate, carefully place your seedlings in it, and cover them up to hold it in place. We’re just using clay pellets or perlite, instead of dirt, unless you’re using a deep-water kit – in which case, just follow the suspension steps with your kit. You can skip the next step if you are using a deep-water culture.
11. Set your timers
This step is one that will rely on your specific kit. For instance, an ebb and flow hydroponic system will likely have timers set to go off every 15 minutes out of every hour. By contrast, aeroponics have short, quick bursts of watering that last every 3 to 5 seconds, and which occur every 5 minutes or so.
Stick to your instructions for now and if they give you a value like ‘every 10 to 15 minutes’, start with the lowest of 10 minutes and see how it performs. Always err on the side of caution first – you can tweak your system later, but by choosing the lowest interval first we know your seedlings will be getting enough attention to get a ‘running start’.
12. Power everything up and we’re done
At this point, we just need to make sure that everything is connected, powered on, and all timers are set – if you are using growing lights, make sure they are on and that their timers are set and appear to be active. At this point, your hydroponics system is up and running – all that you need to do is keep an eye on your plants and maintain the system and it should work its magic with your tomatoes.
Within a month, you should see your FIRST tomatoes and typically, in 2 months it’ll be harvest time – Hydroponic tomatoes are much faster than soil-bound ones, so your first harvest is really going to be exciting!
Before we close this section, we’ll give you some quick tips on monitoring your tomatoes and making sure that everything is running like clockwork.
Monitoring and maintenance
Now that the hard part is out of the way, you can enjoy yourself a little but the job is not completely done – we’re in that final ‘patient monitoring’ phase that comes with any kind of hydroponic gardening. Here are some quick tips to keep in mind as you grow your hydroponic tomatoes:
Keep an eye out for algae – usually keeping your reservoir out of light will do the lion’s share of the work, but if you see it then you want to deal with it fast before it starts clogging up the works. Cleaning the reservoir with a hydrogen peroxide solution (3 ml of a 3% Hydrogen peroxide per gallon of solution should clean it) – you can see a good article on the subject at General Hydroponics here.
Check your EC and pH every 3 days for best results.
Trellis those tomatoes as soon as they’re big enough, tying them in place (loose zip ties are gold for this!) and pruning them as-needed. With taller varieties you can snip the main stem at a point just above 2 buds to encourage sideways growth rather than vertical to keep within your size limits.
Nip off suckers as they show up – they’ll drain resources if you don’t and trimming them early lets your plants divert that extra energy into growing fat tomatoes for you!
Look over your tying framework again as soon as they blossom – those fruits need to be supported or you’re going to curse when that extra weight causes problems. Reinforce them as soon as they blossom and you’ll avoid headaches.
You still have to watch for diseases, just a little less. Keep an eye out for telltale discolorations and a quick Google will tell you how to deal with them before they can become a bigger issue.
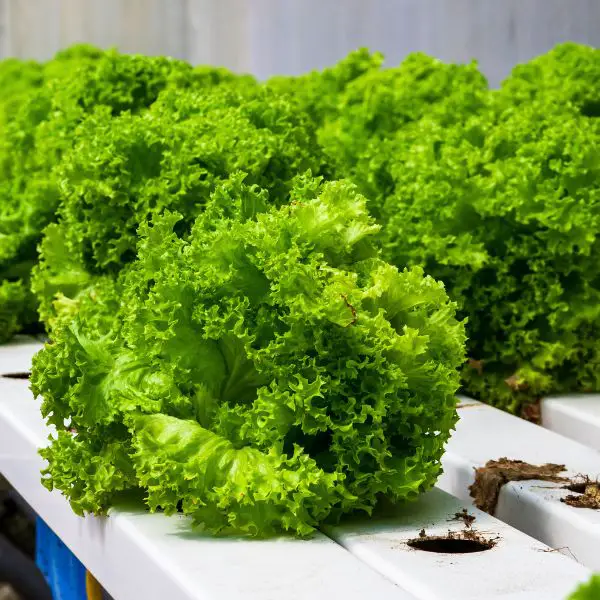
Pick those tomatoes as soon as they’re red and soft – and bite into one right away. We won’t spoil it, let’s just say you’re about to be very happy that you decided to grow hydroponic tomatoes!
FAQs
It’s just about time to call it a day, but before we check out we’ve got a few frequently asked questions on the subject of growing hydroponic tomatoes that we thought you might find useful. Let’s take a look!
Will hydroponic tomatoes keep producing?
If grown indoors, hydroponic tomatoes may produce for anywhere between 8 to even 12 months per year! Tomatoes are perennials, after all – we’ve just gotten used to growing them as annuals since the cold quickly kills these plants.
How much light do hydroponic tomatoes need?
Hydroponic tomatoes grown inside are going to need a lot of light – approximately 12 to 18 hours of it each day. LED grow lights can help to defray prohibitive costs and get the kind that you can switch – the blue light is good until they blossom, and then you want to switch to red.
Why are hydroponic tomatoes flowering but not fruiting?
Tomatoes are particular about the temperature when it comes to fruiting. You’ll want to make sure that during the day they’re in a comfortable range of 65 to 75 degrees and at night, no lower than 55 degrees. If the temperature goes too low, then the cold can hurt your plant, and if it goes over 85 degrees then they will simply fail to fruit.
Video of how to grow tomatoes hydroponically
Wrapping up our guide on how to grow hydroponic tomatoes
That’s about all of the time that we have for today but we hope that you’ve enjoyed this guide on how to grow hydroponic tomatoes. There are definitely advantages — faster plant growth, higher yields, water conservation – but you’ll need to do a little planning and preparation in advance if you want to succeed.
At its most basic, we’re just skipping the soil and hydrating the plants roots with nutrient solution, so just keep that in mind as you set up your own hydroponics and try to stick to the basics that we’ve outlined today to get started.
Later on, once you’ve tried your first batch of hydroponic tomatoes, you’ll have a new skill that you can build on and the sky’s the limit! We hope that you’ve enjoyed the article today and we look forward to hearing your comments and shared stories about your own hydroponics at home soon!