A lot of folks have been asking us how to grow tomatoes in buckets and so by popular demand, we’re going to explore this subject in detail today. When space is at a premium and you still want fresh tomatoes, growing them in buckets is just about the perfect solution. Not only is it easy to do, but with 5-gallon buckets, you can easily keep your plants on the porch or your balcony and they’ll be perfectly happy there.
So, what are you waiting for?! Let’s talk about how to grow tomatoes in buckets so that you can get started with a self-contained mini-garden for the best type of tomatoes out there – the ones you grow on your OWN!
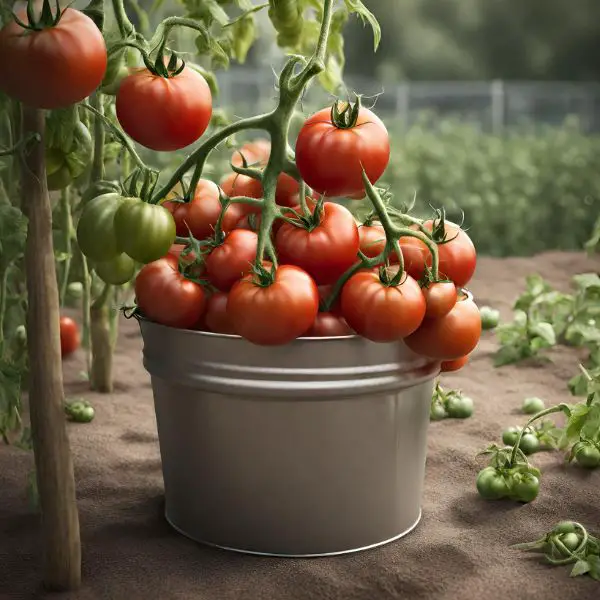
Growing tomatoes in a 5-gallon bucket

In the sections below we’re going to tell you what you’ll need to do to get started. We’ll list the materials individually, as well as what tools you need, and give you a step-by-step process so that you can start off by germinating your seedlings and then preparing their new home where they can grow and mature.
Along the way we’ll include the occasional video link to make sure that you have a solid mental image of the process, so that by the time we’re done you’ll know exactly what you need to do from start to finish.
Preparing your seedlings
While you could just start from seed, some folks like to give their plants a head start by preparing the seedling in advance. For instance, you could plant 3 seeds using this method and when the plants spring up, you can pare the weakest and transplant your strongest tomato plant for the best chances of success.
This part is completely optional, of course, but if you like the idea or ensuring that your tomato plant ‘hits the ground running’, then let’s take a look at how this is done.
Note: You can use plastic starter pots if you like, but the fabric ones that we’ve linked are also a very good idea. That’s because developing roots tend to ‘circle around’ when they meet plastic, but when they touch fabric, they will prune themselves instead. This makes transplanting your young plant a piece of cake!
Materials needed:
- Tomato seeds
- Starter pots or a seed starting tray (fabric examples of starter pots, the smallest (4.5 x 5) is best)
- ‘Starting soil’ (here is a good example)
- Fertilizer
- Grow lights or a roomy, south-facing windowsill
- Spray water bottle
- Heating pad
Steps:
- Scoop out some of your starter soil and moisten it up with a few sprays from your water bottle – one or two quick sprays is just about perfect. Fill your starting pot halfway and don’t compact the soil, and we’re ready to plant your seeds.
- Plant 3 tomato seeds into your starter soil, covering each up with ¼ inch of soil and give it a couple of light pats.
- Give the top a single spray from your water bottle so that the top layer is moist and put them on top of a heating pad somewhere the cat or dog won’t be able to get to them (if you have pets). This area doesn’t have to be light – the warmth from the heating pad should be enough to encourage the sprouts to make their first appearance.
- Once your sprouts have appeared, then it’s time to move them to your windowsill and they should be ready within 7 to 14 days. During this time, you’re going to have to choose which one is going to be transplanted to your bucket (or buckets). Trim the weakest 2 sprouts so that only the strongest one is left in the container.
- As soon as it’s big enough to handle you can transplant your new plant to the bucket. Click here and you can see a video on transplanting your seedlings so that you can actually see how big they are at this stage and transplant with confidence!
Of course, you’re going to need somewhere to put it, but the actual bucket preparation is easily the simplest part of the process. Get your drill (or a hammer and nail will work if you don’t have a drill) and let’s move on to making your tomato plant’s new home!
Preparing your bucket
Now that you’ve got your seedlings germinated and ready, we need to whip up their new home for them, and it won’t take you very long at all. Below you’ll find the steps that you need and we’ll give you some tips after this to help ensure that your tomato plants grow up healthy and strong!
Materials needed:
- 1 or more 5 gallon Buckets
- Potting soil
- Peat Moss
- Perlite
- Stakes or makeshift trellis (see step 4 below)
- Fertilizer (water soluble is best)
Tools:
- Drill
- ½ inch drill bit
Steps:
- Go ahead and turn your bucket upside-down and with your drill and a ½ inch bit, make 4 to 6 holes in the bottom and keep them as evenly spaced as possible for good drainage.
- Turn your bucket back over and it’s time to add our soil medium. We want a mix of 1 part perlite, 1 part peat moss, and 1 part potting soil, so that half or ¾ of the bucket is full.
- Scoop a little section out in the middle so that you may transplant your germinated seedling to its new home. Ideally, you want to cover it up so that the top leaves are just above the soil and you want to pat the soil medium down to secure it into place.
- At this point, you can add your stake that will be used to trellis your tomato plant, or if you don’t have a stake, you can whip up a nice makeshift trellis with old coat hangers like they do in this video.
- Water your tomato plant deeply, pouring the water in slowly until you see it draining from the bottom. Go ahead and add your water-soluble fertilizer at this point and as tomatoes are ‘heavy-eaters’, fertilizing them every 2 weeks is a good idea. Aside from this, however, we just need to water this plant whenever the top inch of soil is dry and let Nature do the rest!
Tips for a successful bucket crop
In this section, we’ve compiled some tips so that you can grow your bucket tomatoes successfully and hopefully avoid a few common pitfalls along the way. Here are some things to keep in mind while you are growing those bucket tomatoes:
- Determinate vs. Indeterminate tomatoes – When you are picking your seeds, determinate tomatoes will only grow to be 1.5 to 2 feet high, whereas indeterminate varieties just keep growing until frost can kill them off. You can grow either, just keep in mind indeterminate tomatoes will need a lot of support. On the flipside, some determinate varieties don’t need support at all, such as ‘Tumbler’ tomatoes!
- Don’t skimp on the sunlight – Tomatoes need at least 6 hours of sunlight each day, so be sure to pick a spot where they’re gonna get it! They also like warm temperatures, with 70 to 5 degrees being ideal.
- Check twice on hot days – On hot days, check the top inch of soil twice during the day to see if your plant needs more water. You want that top inch of soil to be moist, not soggy, and on really hot days the extra help will be appreciated by your plant.
- Group your buckets – If you are growing more than one tomato bucket, group them together. This can help on the aforementioned hot days, as your tomatoes can help to provide a little shade for each other throughout the day.
- Harvest early – When your tomatoes have reached about 50% of color then you can harvest them right away if you like. The tomatoes will continue to ripen away from the plant and while you can certainly wait longer, don’t wait TOO long or insects and local animals will start snacking on your tomatoes.
- Water at the base – Always water your bucket tomatoes at the base of the plant. You don’t want to get water on the fruits or the leaves, as this can increase the risks of fungus developing on your plants.
- Switch fertilizers as-needed – Your tomato plant will need different nutrients at different times in order to grow up healthy and strong. To properly address this, we’re including a little section below that details what types of fertilizers you’ll need at different stages of your plant’s growth and we’ll also share some homemade fertilizer ingredients.
Fertilizers by phase
For ideal results, we’ll document below the ideal fertilizers by your plant’s growth phase. That way you’ll have the perfect fit for its needs as it grows and matures. Here are the ideal NPK fertilizer balances:
- Seedlings – During this phase we won’t need to add extra fertilizer – you can and some people like to do it anyway, but technically your seeds will already have everything that they need to start the first leaves.
- After transplanting – 3 to 4 weeks after transplanting, nitrogen is the most important nutrient for your plants, but if you already have plenty of nitrogen, then a bone meal fertilizer with an NPK of 3-15-0 is ideal If not, an easy solution is a 10-10-10 water-soluble fertilizer.
- Flowering phase – In the flowering phase, you want about twice the amount of potassium to the nitrogen in your fertilizer, so your best commercial options will be either NPK 6-24-24 or 8-32-16. Both will get great results and should be waiting at your local nursery or favorite online retailer.
- Fruiting – Phosphorus is king when your tomato plants are finally fruiting, so you’ll want to go with either a 18-18-21 or a 24-8-16 fertilizer for best results.
Homemade fertilizer ingredients
For our last section for your growing tips, we wanted to include a quick reference to fertilizer ingredients for folks who are making their own blends at home. A lot of garden enthusiasts like to start with a base of 50% matured compost, and add in mixes of ingredients such as the following:
- Alfalfa pellets or leaves – Great for adding nitrogen.
- Banana peels – Diced ‘em up for potassium.
- Coffee grounds – Another potassium source.
- Crushed eggshells – Chock full of calcium.
- Epsom salt – A good magnesium source.
- Hair (animal or human) – These add nitrogen and keratin to the mix.
- Kelp meal – Potassium from the sea!
- Tea grounds – More potassium and less waste!
- Wood ashes – Potassium-packed and easy to get.
These are just a few examples, but be sure to do a little Googling on homemade fertilizer options – you’d be surprised just how many waste products you can repurpose to really ramp up growth in your garden!
Consider a grow bag for self-pruning
We won’t go into a lot of detail on this since we are focused on bucket tomatoes, but you might want to consider trying a grow bag if you have any problems with your bucket tomatoes and your roots getting tangled. Grow bags are inexpensive and typically made from a non-woven fabric, and this comes with the perk that roots will self-prune when they touch that fabric. By contrast, in a bucket, the roots tend to circle around and it can be problematic sometimes if you’re unlucky.
They also look a little nicer than buckets and take up the same space. You can see some examples of 5 gallon grow bags here to see what we mean. It’s virtually the same thing, except you’ll get handy side handles, better drainage from the fabric, and a much healthier root system at very little expense.
Just a little food for thought if you fall in love with your new bucket tomatoes and feel like giving them a little upgrade!
FAQs
We’ve just about used up our space for the day, but before we wrap things up we’ve collected a few frequently asked questions about bucket tomatoes that we think you’ll find useful. Let’s take a look and you can see if you agree!
What are the best sauce tomatoes for buckets?
Probably the best bucket variety of tomatoes for whipping up homemade sauce and salsas would be San Marzanos. These plum tomatoes originate from the Campania region of Italy and they are not only flavorful but juicy without falling into the ‘watery’ category.
Grown in a bucket, they’ll spring up rather similar to the way a bush would, so be sure to use or create a small trellis for them, and when harvest time arrives, prepare to be amazed with your fresh San Marzano sauce tomatoes!
Can I grow tomatoes in a 1-gallon bucket?
Actually, YES, if you are short on space or simply love tony tomatoes for your salads, then you can certainly grow them. Several microdwarf varieties exist, such as Orange hats, Minibels, and Monetkas that will grow perfectly well in a 1-gallon bucket.
How do you tell if bucket tomatoes are over or under-watered?
Signs of overwatering your bucket tomatoes include yellowing or blistered leaves, and sometimes even the stems will yellow if they’re simply drowning in water. By contrast, under-watered tomato plants tend to wilt, so this is another thing that you can watch for.
Check the top inch of soil and see how it feels. If it’s dry, then your tomatoes need to be watered, but if it’s soggy then you’re watering them too much and you need to leave them alone until that top ich dries out. Don’t worry – you’ll get a feel for it, just get in the habit of checking that top inch of soil with your index finger every day and you’ll learn your plant’s watering schedule intuitively.
Video Using Paint Buckets To Grow Tomatoes
Some final words on how to grow tomatoes in buckets
In today’s article we’ve taken a look at how to grow tomatoes in buckets and it’s actually quite easy to do. Tomato plants do fine in 5 gallon buckets, as they are wide enough and deep enough for them to grow up healthy and strong. Keep in mind that grow bags ARE a little better, as the fabric means that the roots will self-prune, but you can grow your plants in a bucket for now so that you can get a feel for how it’s done.
Don’t forget to fertilize every 2 weeks and when harvest time comes, don’t wait around for TOO long. After all, fresh and homegrown tomatoes are delicious, and if you don’t harvest them in a timely fashion then your local insects and other wildlife will be happy to do it for you!
Thanks so much for visiting us today and we wish you and your bucket tomatoes the very best!
More tomato guides
- Why is my Tomato plant turning yellow?
- How far apart should tomatoes be planted?
- How long does a tomato plant live?
- Top 18 Best Grow Bags for Tomatoes
- 5 Common Types of Tomato Worms
- 15 Great Companion Plants For Tomatoes
- Why Should You Not Plant Cucumbers Near Tomatoes
- 9 Best Types Of Tomatoes To Grow In A Pot