Gardenias often steal our hearts with their glossy, emerald, evergreen leaves and the famous, heady, perfumed flowers that grace us with their intoxicating scents in the summer.
They usually stay relatively compact, though some can grow up to or beyond 40 feet tall, so they’re great for small spaces. But, they are known for being particularly persnickety when it comes to their care.
Gardenias need everything to be perfectly “just so” to grow their best. So when you see yellowing leaves on these precious plants, you need to figure out what they are trying to tell you.
Here we’ll discuss everything about gardenia getting yellow leaves, and how to return their glossy green glow.
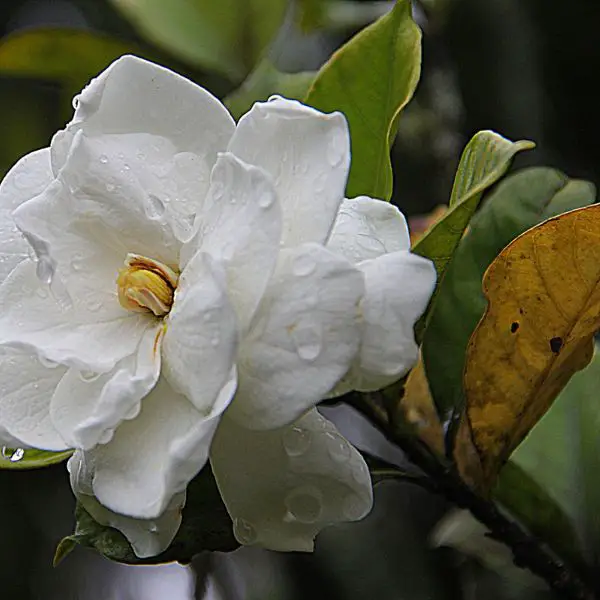

Table of Contents
Where Do Gardenias Originate?
One of the most popular species, Gardenia grandiflora or Gardenia jasminoides is indigenous to Asia, specifically southern China and Japan. Other species originate from tropical regions such as Africa, Madagascar, the Pacific Islands, and Australia.
As you can tell, these plants need similarly tropical and subtropical conditions to thrive. Warm temperatures, high humidity, the correct amount of light, lots of nutrients, and plenty of water are all needed in conjunction to keep these plants happy.
In the United States, these bushes grow best in Zones 8 through 11. As a result of hybrids and lots of cultivation, there are some varieties that are hardy up to Zone 6. In colder climates, these plants will need to be grown indoors, which can be another challenge.
Don’t worry if you have trouble growing happy, healthy gardenias, even master gardeners with plenty of experience with the plants sometimes lose them. They’re beautiful plants, but they’re rather fragile.
Gardenia Growing Tips
When strolling through the nursery, we often look for healthy bushes with lots of flower buds on them. We expect to put them in the ground and watch the plethora of buds explode into a menagerie of white petals and heavenly fragrance.
Unfortunately, when these plants get placed in the ground they need a time of adjustment. During this time, the buds often fall off, leaving us confused and frustrated.
When looking to purchase gardenias, pick out plants that don’t have many buds. Once the plant has adjusted to its new home, it should start growing new flower buds.
You can also leave it in the pot for a little while as the flowers bloom. But remember, the best time to plant most flowers and bushes is in the fall or spring.
When growing gardenias in containers, place them in unpainted terracotta pots. These plants need plenty of water, but they are prone to root issues such as root rot. Using terracotta pots helps the water to evaporate, leading to watering more often, but also reduces the risk of root rot.
Reasons Gardenia Leaves Turn Yellow
There can be several reasons gardenia leaves go from glowing green to sickly looking yellow. The age of the leaves can be a factor, watering habits, root problems, improper soil, lighting, and nutrients can all affect the leaves of these plants.
We’ll go over each of these and more, and include how to determine the causes and the steps to take to remedy them.
Age Of The Leaves
Most plants will periodically drop leaves off as they grow. It’s quite similar to how we will lose the occasional strand(s) of hair as new ones are grown.
As long as an occasional, older leaf turns yellow and drops off, this usually isn’t a cause of concern, as it’s a natural process. These leaves will be more sporadically placed and at the bottom edge of leaf growth.
Younger, yellowing leaves or large clusters of yellow leaves mean something is affecting the plant that needs to be inspected.
Over Or Under Watered Gardenias
Too much, and too little water will cause gardenia leaves to turn yellow and eventually fall off. When the plant gets too much water, the leaf’s cells will get damaged, resulting in yellowing and dying leaves.
Alternatively, too little water will cause the leaves to dry up, causing a loss of color (yellowing) and leaf drop as well.
The proper amount of water for gardenias is typically about an inch of rain or watering per week. Depending on the time of year, temperature, soil type, and much more, the water needs of the plant may increase or decrease.
The best way to tell how much water the plant needs is to check the soil. These picky plants like moist, well drained soil, not too dry, not too wet. You should water your gardenias when the first inch of the topsoil is dry.
Too much water or dense soil that doesn’t drain well can cause a number of secondary problems such as root rot, which we will tackle next.
Root Rot Will Cause Yellowing Leaves
When a plant’s roots are constantly soaking in water because of overwatering, or improper drainage, root rot can set in. While yellowing leaves are one of the first symptoms, if the problem isn’t treated quickly, root rot will be fatal to the plant.
Since so many plant problems present themselves with yellow leaves, checking the soil and the roots is a more reliable way to check for root rot. The first indication is soggy, or constantly wet soil.
If it’s been a while since you’ve watered the gardenia, but the soil is still moist or soggy, you’ll need to literally dig a little deeper. Be careful when digging around the roots of your plants, disturbing the roots too much can put the plant into shock.
Use your hands if you can to carefully dig down a few inches around the plant to get a good look at its roots. If it’s in a pot, you can gently pull it out of the pot to inspect the roots.
What you want to see are firm, white, or light colored roots, and only an earthy, healthy soil smell. If you see dark brown, black, mushy roots, or you smell a foul odor, your plant is suffering from root rot.
Bacteria will settle in when the soil is too wet and they will feed on the roots, turning them mushy, and rotten, and eventually destroying the plant.
What Can You Do When Gardenias Get Root Rot?
Depending on the severity of root rot, you may be able to save the gardenia, or in advanced cases, you’ll have to get rid of it and start over.
Treating root rot is the same whether the plant is in a pot or in the ground. You’ll need to remove the plant from the soil.
If you’re digging it from the ground, you’ll need to dig a few inches away from the drip line. The drip line is the outer edge of the plant’s foliage, this is about how far its roots extend in the ground.
Once the plant is out of the ground or away from the pot, carefully remove the wet soil, trying to disturb the roots as little as possible. Trim away any black, mushy roots, and discard the old soil. The bacteria will be prolific in the dirt so it’s better to start over.
Replace the soil with coarse, well draining soil. You can add perlite, small gravel, vermiculite, or another type of coarse material to the soil to aid in drainage.
Replant the gardenia, give it a light drink of water, and be sure to let the soil dry out slightly before watering again. After this “plant surgery,” the gardenia may experience some dieback or transplant shock, but with a little luck, it should come back.
Poor Soil Drainage Can Cause Yellow Gardenia Leaves
We’ve already touched on this a little but it bears repeating. Gardenias need well draining soil whether they are in pots or in the ground. Heavy clay soils often spell disaster for these plants.
The reason poor drainage causes yellowing leaves is because the plant gets too much water, even when you don’t water very often, and the roots don’t get a chance to dry out. This likely will lead to root rot.
This is an easy fix if you remedy your soil before you put the gardenia in the ground. When you’re digging the hole and you notice thick, heavy soil, add in plenty of mature compost, perlite, or mulch to increase the drainage.
When the plant is already in the ground it’s a bit more complicated because uprooting the plant can harm it significantly. Instead, try scraping away the upper layer of the soil and mix in some of the previously mentioned additives.
Over time, these will work their way down to the roots of the plant while slowly increasing the drainage.
Aerating the soil around the gardenia can help too. After you do that, add in some fine perlite or vermiculite to help add some tiny air pockets.
What About Sand For Aeration?
Some claim that adding sand will help aerate soil, but you should be careful doing that. If you have thick clay soil, adding sand can make things worse.
Clay has very fine particles, and when sand is added, these microscopic particles settle around the grains of sand, effectively packing the ground even more. This mixture of clay and sand can give the soil a consistency similar to concrete, especially when it dries out!
Insufficient Sunlight Can Create Yellow Leaves
Plants need sunlight to make food for themselves through their leaves. When there isn’t enough sun, the chlorophyll degrades, turning the leaves yellow.
Typically too little sunlight will produce “leggy” plants with fewer leaves and flower buds as the plant stretches to get the light it needs. Still, you may see yellow leaves throughout the plant when it doesn’t get enough light.
Gardenias grow best getting full, morning light, and dappled shade during the hotter part of the afternoon. In cooler climates, they can handle more sunlight, but in hot climates, they need to be protected from the intense afternoon sun.
When you are growing gardenias indoors, they need between 6 to 8 hours of full sunlight in a sunny window for proper photosynthesis.
When planting them outside, locate an area that gets the proper amount of sunlight. A good quality grow light can help if you don’t have a window that gets enough light.
For a plant that’s already in the ground, you may need to transplant it if it’s not too large to move.
Low Humidity Can Cause Yellow Gardenia Leaves
Since these plants come from tropical regions, they desire a humid environment. When the air is too dry, they will lose moisture quickly, leading to yellowing leaves.
When the soil, water, and light isn’t a problem but you still have yellowing leaves throughout the plant, you may need to check the humidity.
Gardenias prefer humidity levels between 50% to 60%. Indoors this is easier to accomplish, but when it’s dry outside, there is something you can do.
Using a humidifier, misting the gardenia, or placing the pot on a tray of pebbles and water can help you get the correct humidity for them.
Outdoors, when the air is dry, place a few shallow containers around the plant and fill them with water. The water will evaporate in the heat, increasing the humidity around the plant. Just continue to fill the containers as they dry out during dry spells.
Cool Temps Can Lead To Yellow Leaves
Gardenias are evergreen bushes and can tolerate winter temps that dip down to the mid teens, but during the growth season, if temperatures get too cool, some of the leaves may turn yellow.
Ideal temperatures for gardenias are between 60 to 70 degrees Fahrenheit. When the temperatures suddenly dip below this range, some of the leaves can suffer, turn yellow, and may eventually drop off.
Outdoor plants are at the mercy of Mother Nature, so all you can really do is wait for warmer weather. Indoor plants need to be kept in the ideal range for best growth.
Insufficient Nutrients Can Lead To Yellow Leaves
Chlorosis in plants will lead to yellowing leaves. Often the edges of the leaves will start turning yellow or the discoloration could start at the base of the leaf.
These are typically because of mineral deficiency, mainly from low levels of magnesium or iron.
While it may be difficult to know which mineral is lacking in your plants, if you see yellow leaves with green tips, it may be a magnesium deficiency.
Add a small dose of Epsom salt to help with this deficiency. Dissolve about 2 tablespoons of Epsom salt in water and pour the mixture around the base of the plant. The leaves should begin returning to their natural green in a few days.
Iron chlorosis is typically seen on leaves with yellowing tips, but the base or veins remain green. Add some chelated iron, or liquid iron according the the directions to fix this nutrient deficiency.
The soil pH can affect iron absorption, so if you suspect this is the problem, you may want to check the acidity of your soil. We’ll discuss that more soon.
When To Fertilize Gardenias
Gardenias need to be fed regularly for maximum health and growth. During the growth months, gardenias need plenty of nutrients.
You can add compost in the spring and summer. Just sprinkle it around the base of the plant and let the nutrients soak down to the roots when it’s watered.
You can also use a fertilizer with an NPK rating around 3:1:3 that has plenty of iron. Be sure to follow the instructions on the package and only fertilize during the growth season, not in the winter.
Regular feeding with a quality fertilizer, especially one that is high in iron, or specifically formulated for gardenias can prevent mineral chlorosis. Professional Liquid Gardenia Plant Fertilizer is a great choice for these plants.
Gardenias Need Acidic Soil
The acidity in the soil can have a major impact on gardenia’s health. A high pH (alkaline) can affect the absorption of numerous nutrients that will cause the leaves to turn yellow.
When you’ve been down the list of things that can make your gardenia’s leaves yellow, but still can find the problem, check the pH. This can be done with a simple soil test kit, or a meter that you stick in the soil.
Gardenias prefer a slightly acidic soil in the range between 4.5 and 6.0, 7.0 is considered neutral, and anything higher is alkaline and bad for these plants.
Iron absorption can be affected when the soil isn’t acidic enough. Adding a sulfur supplement or an acidic fertilizer can lower the pH to better levels for gardenias.
You may be able to scatter coffee grounds around your gardenias to naturally help increase the acidity, but recent studies have suggested that coffee and caffeine may be harmful to beneficial worms and soil fauna.
Nematodes Tiny Worms That Turn Leaves Yellow
Nematodes are tiny, often microscopic worms that live in the soil. There are beneficial and destructive nematodes.
Destructive nematodes feed on the roots of plants. In gardenias, nematode symptoms will show up as yellow mottling of leaves, stunting, and dieback, and when the roots are exposed, there could be swollen nodes or galls on them.
There are very few applications that can effectively control nematodes, but soil testing may be required to confirm nematodes.
In light to moderate nematode infections, fertilizer, and proper watering may help; a decent layer of mulch may be beneficial as well. In severe outbreaks, affected gardenias will need to be removed and disposed of.
You’ll need to plant new gardenias in a different area, or plant species that are resistant to the type of nematodes present.
Frequently Asked Questions
Should yellow leaves be trimmed off gardenias?
In most cases, the yellowing leaves should be left on the plant. They will eventually either fall off on their own or return to their normal green splendor. Cutting off yellow leaves may cause the plant to start yellowing more leaves, so it’s best just to leave them on.
Why do gardenias need iron?
Iron is essential in the production of chlorophyll in gardenias. This is the compound that makes the leaves green and aids in photosynthesis. Gardenias prefer acidic soil which results in easier uptake of soluble iron in the soil. This constant absorption of the mineral can deplete natural stores in the soil so gardenias often require supplemental iron.
Can yellow leaves turn green again?
Often, yellow leaves will not turn green again even when you correct the problem. These leaves have lost all their chlorophyll and will turn brown and fall off. The exception to the rule is nutrient deficiencies. In gardenias, magnesium, iron, and other nutrient deficiencies can cause yellowing leaves. When these nutrients are restored to the soil, the leaves often turn green again.
Wrap Up
While gardenias are primadonnas of the plant world, their intoxicating blooms, and beautiful, evergreen foliage keep us snatching them up and planting them in our gardens.
When your gardenia starts getting yellow leaves, you should act quickly to find out what needs to change in order to keep them healthy. Yellowing leaves may be caused by too much or too little water, root rot, soil issues, nematodes, lighting, temperature fluctuations, or simply the age of the leaves.
By working through the possible causes and acting on them accordingly you may be able to bring it back to a healthy green. Understand that gardenias are quite finicky, and even experts sometimes lose these plants despite their best efforts.
With fast action and proper diagnosis, you can give your gardenias a fighting chance at staying healthy, beautiful, and smelling great.
More Gardenia Guides